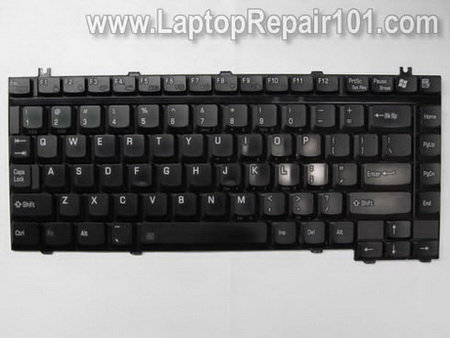
In this guide I show how to disassemble a laptop keyboard.
I’m doing it for fun just to see how it’s built. I’m taking apart a damaged one and have no intention to use it in the future.
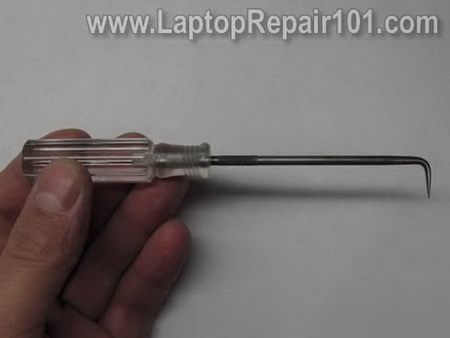
I’ll be using one of my tools shown on the following picture.
STEP 1.
Remove sticky tape securing the cable to back of the keyboard.
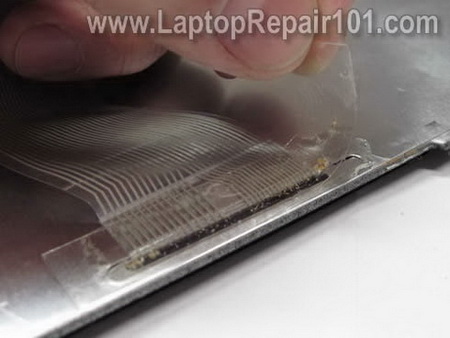
STEP 2.
Carefully unglue the cable from the back.
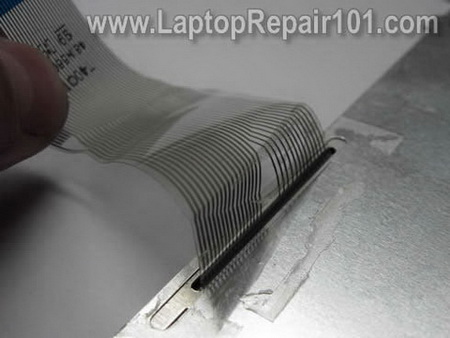
STEP 3.
Start peeling off the aluminum protective film.
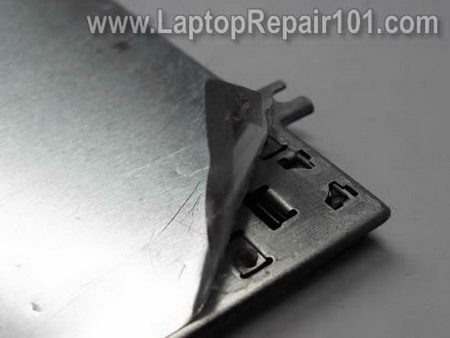
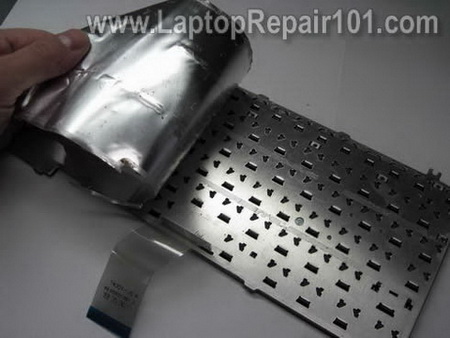
STEP 4.
Remove the protective film.
After the protective film is removed it cannot be reused.
STEP 5.
My keyboard had two plastic separators on the top.
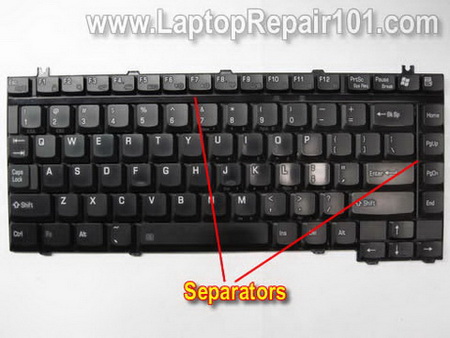
They are secured to the back via pins.
Plastic pins are melted on the back and secure separators in place.
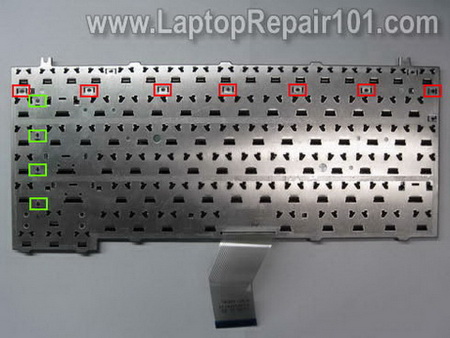
Push all plastic pins though wholes on the keyboard.
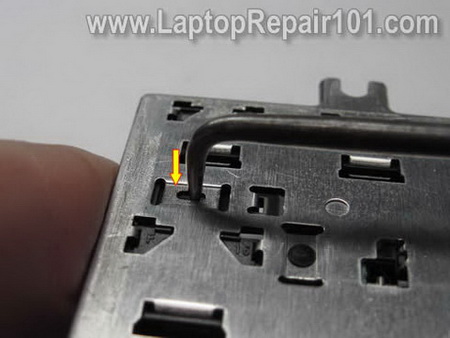
Start removing the separator.
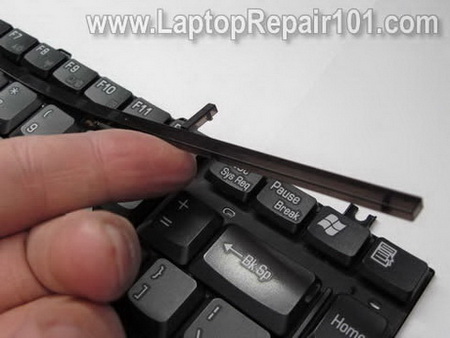
The separator has been removed.
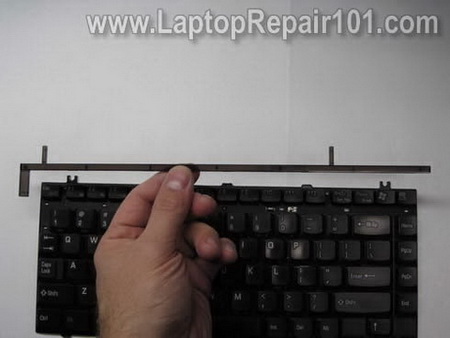
STEP 6.
Now you’ll have to remove all key caps.
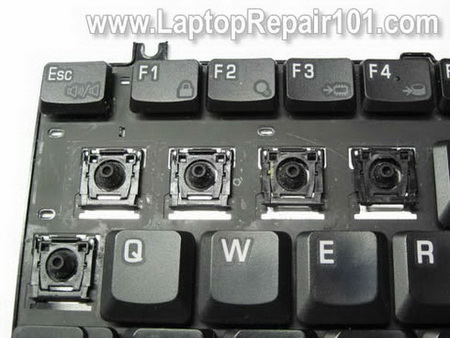
In order to remove the key cap carefully lift it up with your fingers.
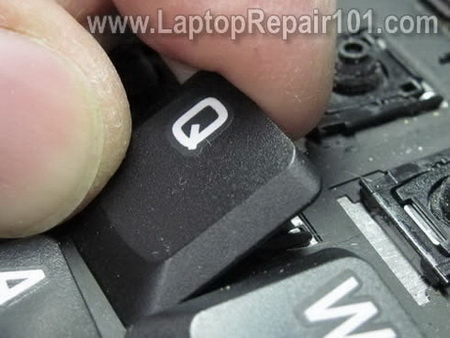
Remove the key cap so the hinge underneath stays connected to the keyboard.
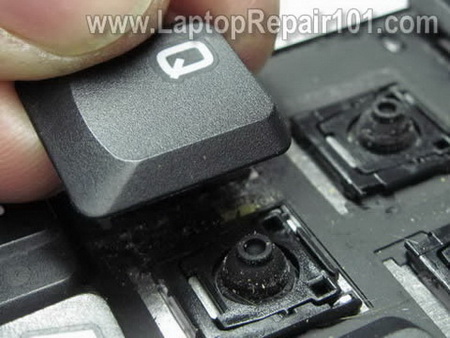
Some big keys have a different design.
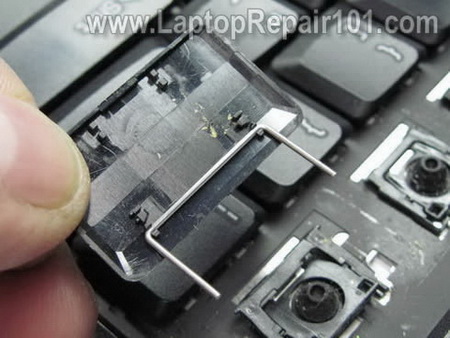
In addition to the hinge, some big keys (Back space or Space bar for example) might have an additional support bracket.
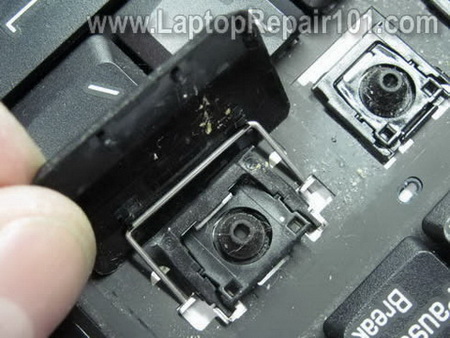
Remove the key cap with the support bracket.
STEP 7.
Some laptop keyboards might have blank covers on the left and right sides from the up arrow key.
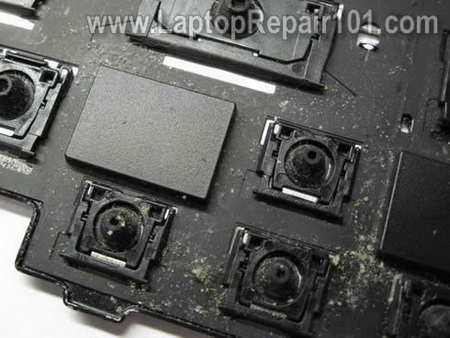
Lift up and remove the blank cover.
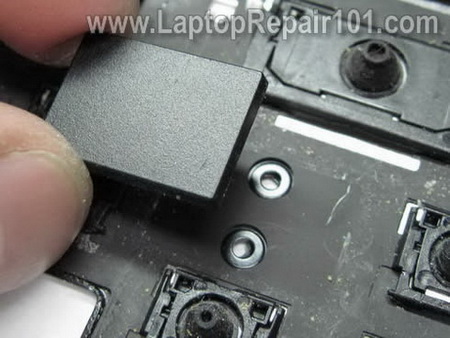
All key caps and plastic separators have been removed.
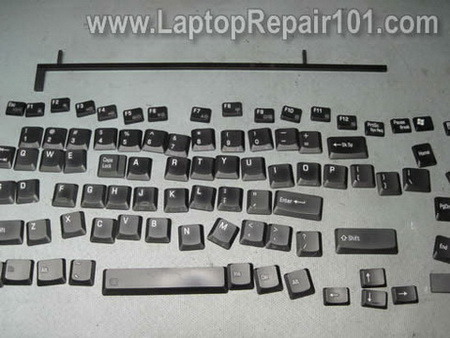
STEP 8.
Now you can start removing key hinges – key lifting mechanisms.
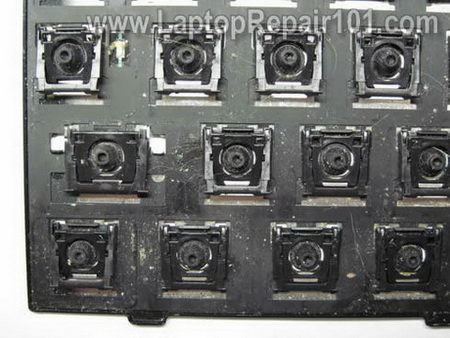
Carefully separate the key hinge from the keyboard body.
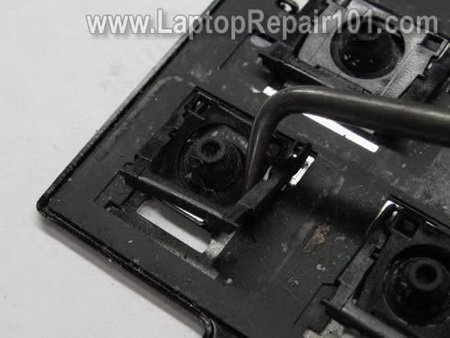
Each key hinge has two parts – external and internal pieces.
When you remove the hinge, try to keep the internal part inside the external. Do not separate them.
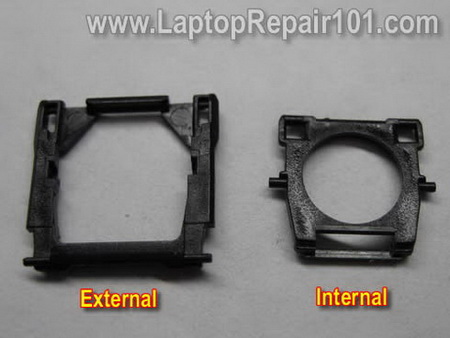
If they separated, put them back together.
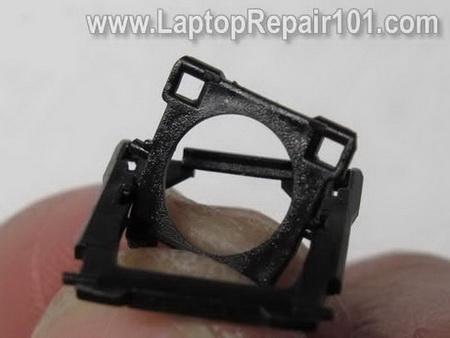
The lifting mechanism (hinge) assembled.
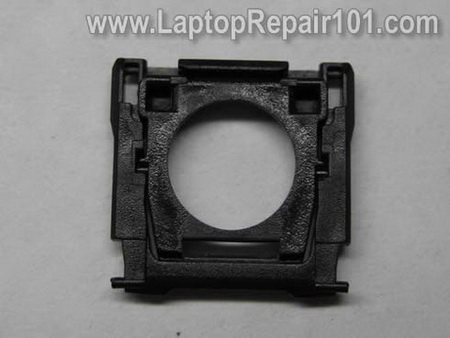
As I mentioned at the beginning, I’m taking this keyboard apart just for fun. That’s why I don’t care about removed parts.
If you following this guide to repair the keyboard, I would recommend to keep all hinges in the right order.
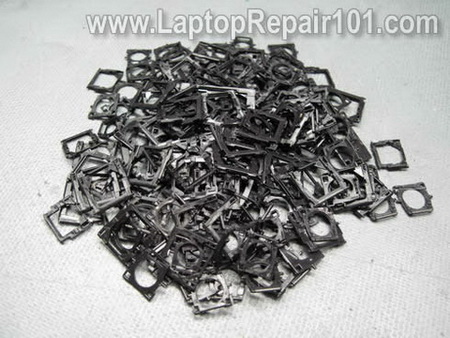
STEP 9.
Remove the sheet with silicone (or rubber) plungers.
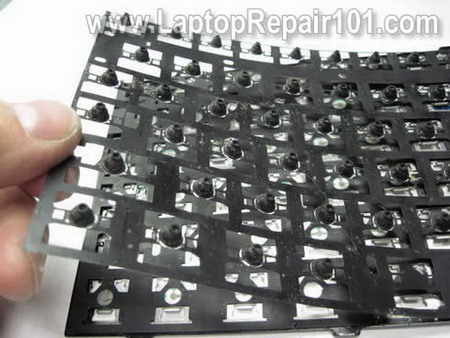
STEP 10.
Remove the second sheet with traces.
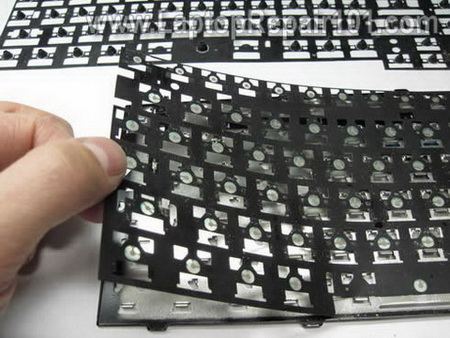
Both sheets have been separated from the base.
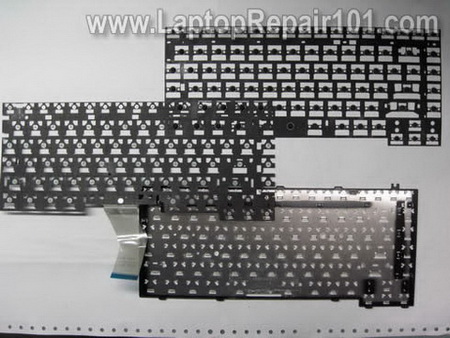
STEP 11.
The sheet with traces has two layers and all traces are running between these layers.
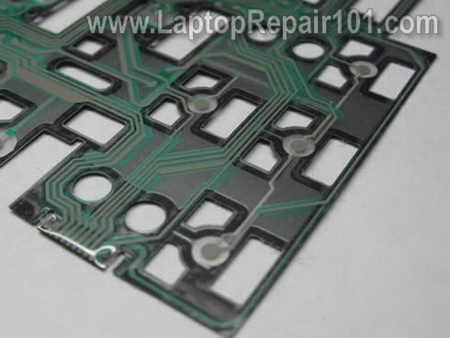
STEP 12.
You can separate these layers from each other.
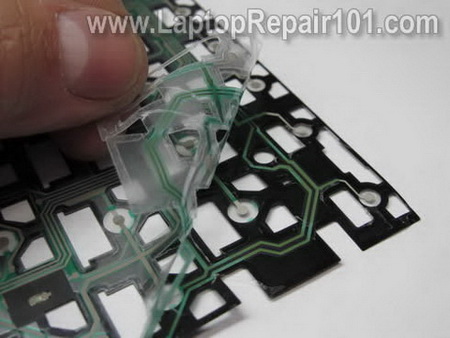
The keyboard has been disassemble.
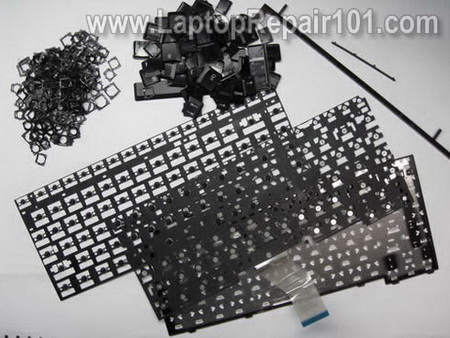
Can you repair a keyboard? My answer is NO! Keyboards are cheap and not designed to be disassembled.
Also read how to repair individual keys.

29 Responses
John
Hi there,
I didn’t disassemble the keyboard but your guide helped me to put the “A” key back in place. It just snapped in place.
servet
hi
im sick of laptops battery , jack ,keyboard etc problems.
how can i connect desktop power supply to laptop.
there are 5 pin from battery
im looking forward to see ur reply
thanks
Fixed my keyboard
Thank you for this post!
You used your guide to remove a few keys for cleaning. It worked!!!
My keys do not stick anymore.
Sam
Rob
At last! A website that talks plainly with great images. You are a star. I salute you. Thank you for dealing with the kind of problems for which we don’t need a dealer or engineer. Keep publishing. Cheers from the United Kingdom.
john chung
hi there i have expriencing replacing the LCD Inverter for my DELL Inspiron 8600 and now is like a scrap metal if someone are kind enough post some instructional video for me to put it back.
Davey
Thanks for the pictorial guides. I can see why most technicians simply replace the laptop keyboard instead of repairing it.
Pat
Thank you for a superb resource website. You are doing a great public service! Your step by step instructions and PHOTOS are excellent. You should incorporate all this into a book. I’d buy it! I look forward to future posts.
Rachel
Hi,
I have SONY VAIO VGN-NR110E and I cannot seem to reattach the space bar.
I don’t have any problems with the other keys.
Can you help me? Thanks!
cj2600
Rachel,
Take a look at this post. http://www.laptoprepair101.com/laptop/2007/03/20/key-fell-off-keyboard/
Iason
I have a toshiba a100 and my keyboard after 3.5 years of use has a few broken keys. Do you think it would be possible to use as a replacement, one meant for a200 or a300. Moreover would it be possible to use one from the backlit keyboard models like e205 etc. I think the size is the same, just the shape of keys changes. But I have no idea about the connections. Thanks
Joe Rosenblatt
This is fantastic. I used this guide on a personal laptop of mine to fix my issue. The photos really help.
Lhincy
Does it apply to all kind/brand of laptop? I am planning to help my friend disassembling her laptop keyboard which is a V3000 HP laptop. Hope we will make it successful.
cj2600
Lhincy,
Why would you disassemble the keyboard?
Just replace the whole keyboard with a new one, it shouldn’t be very expensive.
Michael
It’s way faster to replace the keyboard with a new one. They are not expensive.
jai kumar thakur
sir ,
i have a laptop hp pavillion dv4 1412 . in my laptop my screen is blinking vertically. second is when i insert cd in cd drive. then it says application not found.
plz tell me how to solve the problem
jorge
do you know how can i remove,step mother board from my compaq laptop, key board is out ,battery,and screws, but do not open to access pass cover,sorry but this is my first time,thanks for reply.funny to see my laptop now.
Bonny Basir
Anyone please help me…im using Acer Aspire..recently i use my laptop..while online, suddenly our house black out…when i try to turn on my laptop..its not working anymore…..what should i do…??? i’ve tried the Safe Mode but still not working….please help me…..
Jeko
Thank you! This is the information I needed…But…I find it too time wasting…I’ll buy new one..:)
cj2600
@ Jeko,
That’s exactly the point of this article to show how it’s time consuming to fix a keyboard.
It’s way easier to buy a new one.
Nikon d5110
The photos are the best part of the article. Its amazing how much crud builds up under the keys. yuck!
zee
Hi there,
I was recently facing problem with (ASDFJKL: and Enter Keys)all these keys print dual characters and also have problem with my Arrow Keys that are working in wrong direction.
I have gone through many forums suggesting cleaning and replacing.
I opend up the keyboad keys and cleaned the dust and problem get solved for few minutes but reappeared after sometime.
Then I was told to take out the entire keyboard and clean the inner parts of the keyboard there i removed hair and dust and placed keyboard back in place and problem seemed solved for sometime but reappered.
I found dust and hair stuck inside lower layer of the keyboard the same place notified in picture 3 of yours between the lower alluminium metal part and plastic sheet. But its glued I i left it as it is coz I dont know what type of glue is to use to place plastic covering back on the alluminium sheet. Can you please guide if i remove the plastic sheet to clean then how to fix it back?
Regards
zee
sorry i forgot I am using DV2500 series and its hp DV2670 model.
Regards
Zee
cj2600
zee,
I don’t think that cleaning will help in your case. This sounds like keyboard failure or possible motherboard failure (bad keyboard controller).
Instead of cleaning the keyboard, I would try replacing it with a new one. New keyboards for HP dv2500 laptops are not expensive.
zee
@ cj2600
Thanks for your answer, I recently got a reply from another forum and it solved my problem when keys start malfunctioning:
The solution I am told is to Shut down system and take out battery for few minutes. and It really solved my problem.
However My question still exist what kind of glue is used to place that plastic sheet back on metallic backside of the keyboard.
Thanks
zee
tim bob
does anyone know how to disassemble packardbell easynote tx86 laptop
thnks
cj2600
@ tim bob,
I’m personally not familiar with this laptop. I looked up some pictures on the internet and I think you’ll have to go though the following procedures in order to disassemble the laptop.
1. Remove all covers from the bottom and remove RAM, hard drive, DVD drive if possible.
2. Remove all screws from the bottom of the laptop.
3. Remove the keyboard.
4. Remove all screws located under the keyboard and disconnect all cables.
5. Separate top cover (palm rest assembly) from the base cover.
This is just a guess.
Steve Menice Sr
Greetings Bonny,
What had happened is when the power went out, some of your files that were in use did not properly close which usually do during normal shutdown. To solve this, you should boot using your Windows CD or DVD depending on your version. Choose the repair console which will give you an emergency command prompt. It will ask you which Windows install to log into. Choose #1 then press enter. Next it will ask for your Administrator password. If you set one, enter it now and press Enter. If you did not, just leave it blank and press Enter. At the command prompt, type the following:
chkdsk c: /r
Assuming your windows is using the C: drive, this will correct any open files as well as check your HD surface for any defects. This should correct your problem and allow you to reboot. If successful, do a disk defrag. Afterwards, you should be OK.
Hope this helps you. Take care & God Bless….
Steve from Bacolod City, Philippines.
Lay
Almost followed the crazy steps would have killed my keyboard!
bruce
hp pavilion dv7 . my scroll down key won’t pop up but still works , what should I do ? thanx .B.